LiV comes configured with static IP address 192.168.1.111 for the wired interface and dynamic IP address for the wireless interface. We suggest you to follow this configuration guide. Later on, once LiV is up and running, you can modify the network settings according to your needs.
TCP/IP and DNS settings (most recent software release)
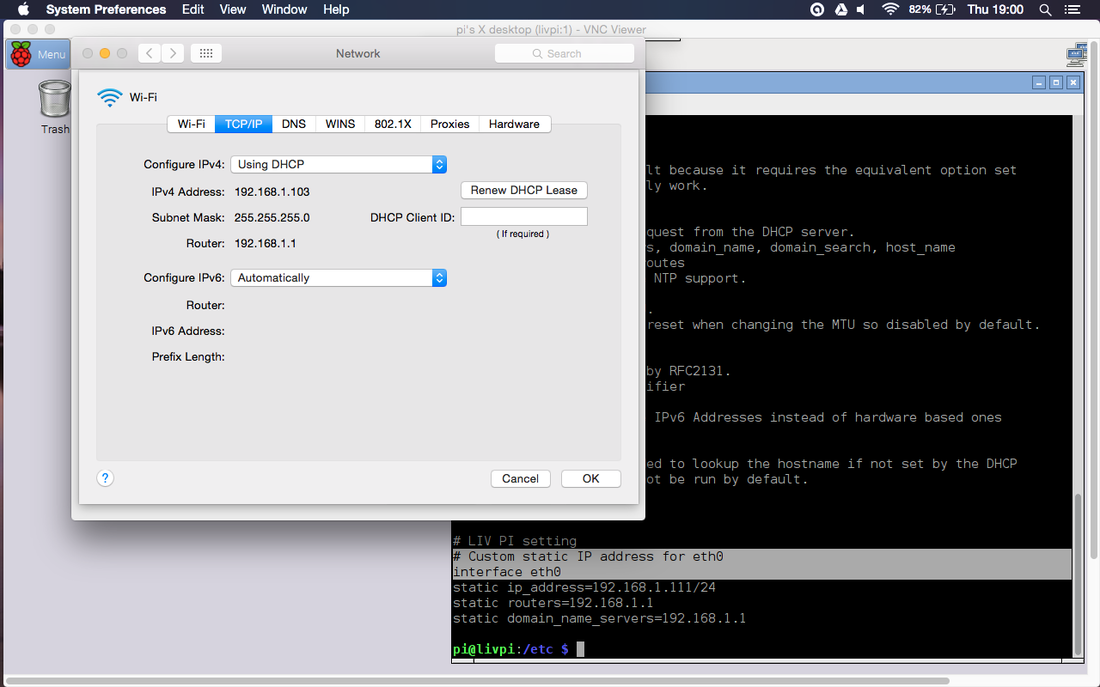
These are the settings for the latest LiV Pi software release (no "/etc/network/interfaces" file anymore!). Connect LiV with an Ethernet cable to your home router. Find out your network settings on your computer and modify the content at the end of "/etc/dhcpcd.conf" so it matches your network. Make sure the subnet, the netmask and the gateway fields match those on your computer. Pick a free static IP address on your home network that LiV can use. (use "ping" command to make sure no one is using it).
THESE ARE OLD SETTING INSTRUCTIONS FOR THE PREVIOUS SOFTWARE RELEASE (December 2015)
Step 1: TCP/IP settings
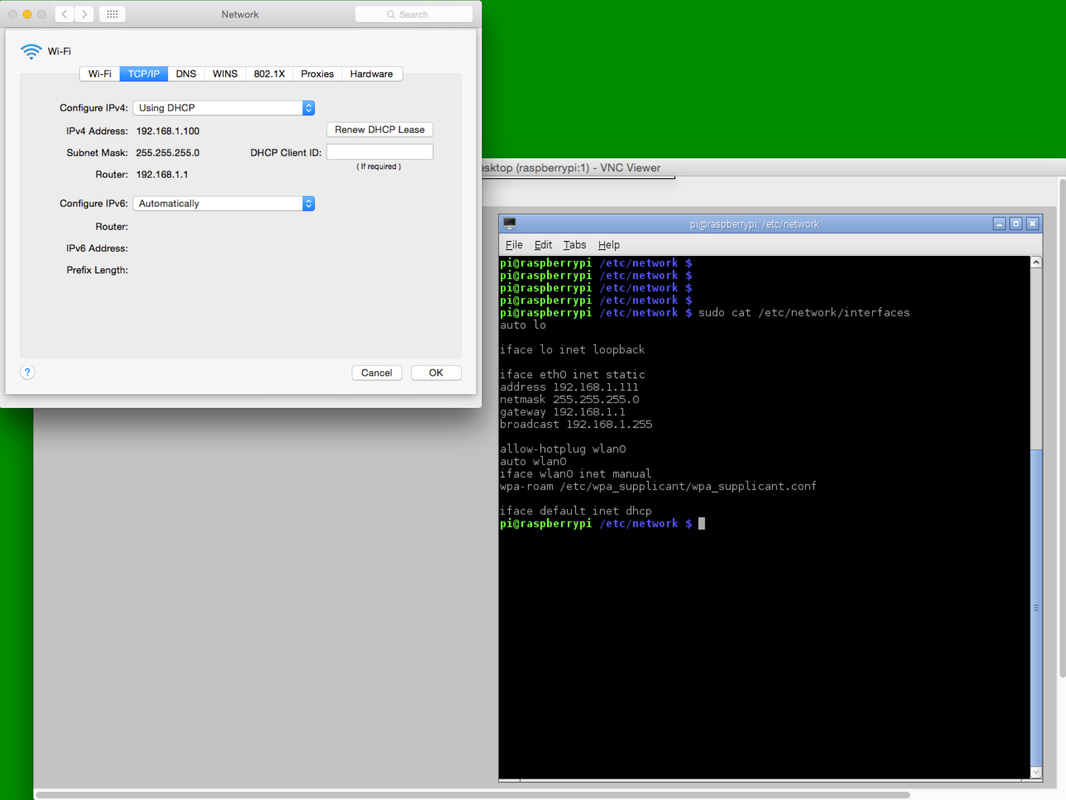
Connect LiV with an Ethernet cable to your home router. Find out your network settings on your computer and modify the content of the "/etc/network/interfaces" so it matches your network. Pick a free static IP address on your home network that LiV can use. (use "ping" command to make sure no one is using it). Modify the "/etc/network/interfaces" file so it matches your network settings. Make sure the subnet, the netmask and the gateway fields match those on your computer.
THESE ARE OLD SETTING INSTRUCTIONS FOR THE PREVIOUS SOFTWARE RELEASE (December 2015):
Step 2: DNS settings
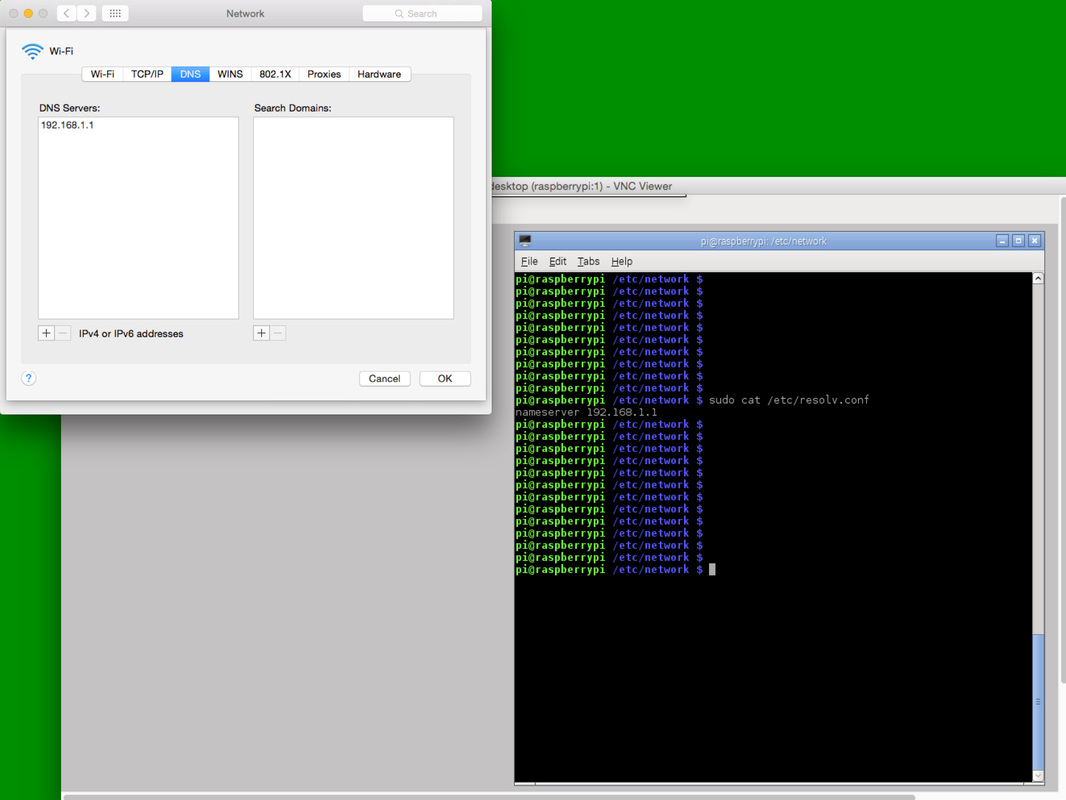
Enter the value of your DNS server into the "/etc/resolv.conf" file. Ping an external site to make sure the DNS settings work (e.g. "ping www.google.com"


