The first time LiV boots, the DS3231 module sets the time to a Jan 1st, 2000 date. Once LiV has an Internet connection, it will take LiV about 15 minutes to automatically sync the hardware clock to the correct time and date acquired with NTP.
Use the following guide only if you have any issues with the DS3231 module.
Use the following guide only if you have any issues with the DS3231 module.
Step 1
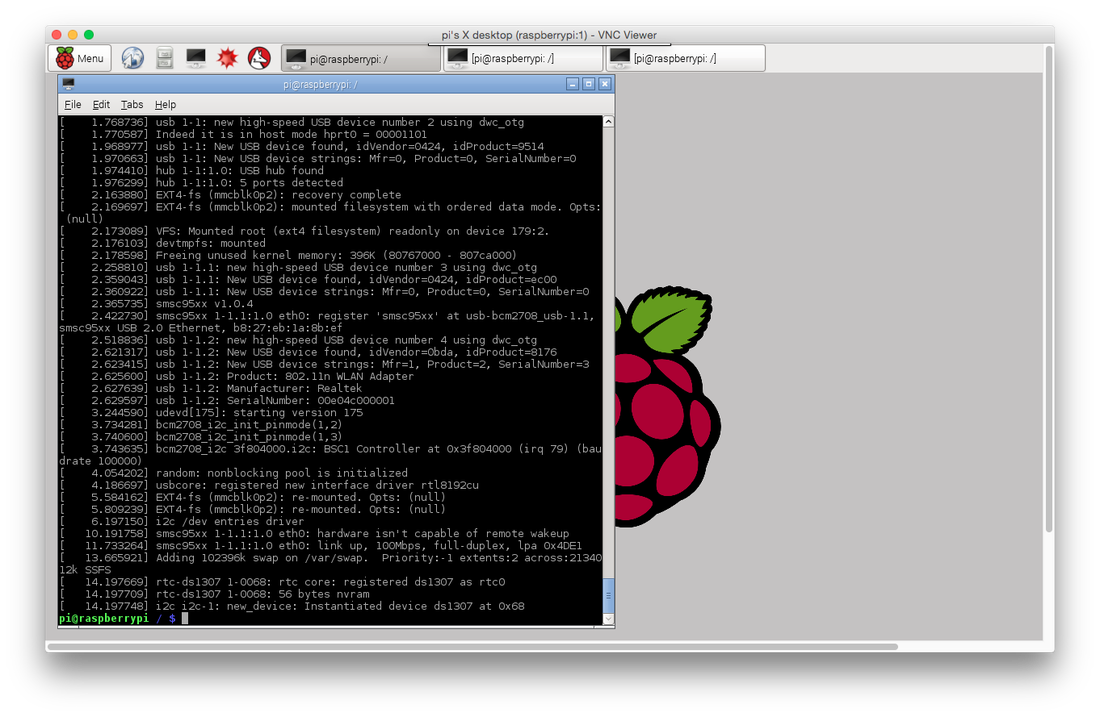
Check DS3231 module registration with "dmesg" command. Have a look at the next photo, at the bottom: you should see a registration message like that for your DS3231 (rtc-ds1307 messages). If you see any errors there, update software with "sudo apt-get update". Take out battery from DS3231 module, plug it back in, insert module into LiV, then shutdown and powercycle. Try "dmesg" command again: you should see no errors.
Step 2
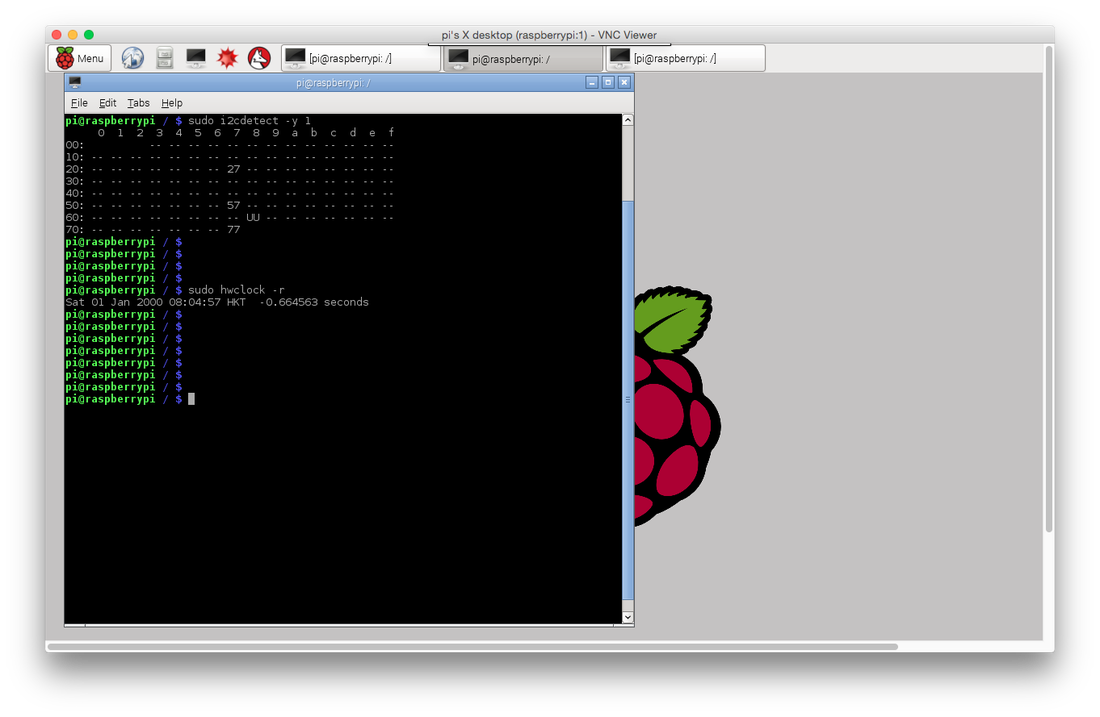
Check the module with "sudo i2cdetect -y 1" command to make sure DS3231 is detected on the I2C bus. You should see the addresses 0x57 and 0x68 (UU indicates it is used by drivers). "sudo hwclock -r" command should show a Jan 1 2000 date if the time was not synced yet.
Check the module with "sudo i2cdetect -y 1" command to make sure DS3231 is detected on the I2C bus. You should see the addresses 0x57 and 0x68 (UU indicates it is used by drivers). "sudo hwclock -r" command should show a Jan 1 2000 date if the time was not synced yet.
Step 3
Once you have an internet connection on LiV, wait until LiV gets the network time with NTP.
Use "date" command to make sure the time is accurate. "sudo hwclock -r" shows the old time stamp. "sudo hwclock --systohc" writes the network time into the DS3231. Make sure the time was written properly with "sudo hwclock -r". Now DS3231 is set.

